P2CFF A/C Clutch Control Driver Temperature Too High means the vehicle has detected excessive heat in the electronic driver that controls the air-conditioning compressor clutch. The code does not automatically prove that the compressor itself is bad. In practice, a dragging clutch, shorted wiring, incorrect clutch current, poor grounds, or a failing control module can all make the driver overheat.
This is an information-focused diagnostic fault code, not a signal to replace the compressor immediately. The exact wording and component location vary by manufacturer, so the vehicle’s service information should be used before testing or condemning a part.
What Does P2CFF Mean?
The A/C clutch is an electromagnetic coil. When the powertrain control module (PCM), body control module, or a dedicated A/C control unit energizes that coil, the clutch engages and turns the compressor. The control circuit contains an electronic output driver that switches current on and off and monitors its own electrical load and temperature.
P2CFF is stored when that driver becomes hotter than its calibrated limit, often because it is carrying excessive current or has been operating under an abnormal load. On some vehicles, a scan tool may describe the same fault as A/C clutch control circuit driver current or temperature too high. Always compare the scan tool description with the manufacturer-specific diagnostic chart.
Common Symptoms of P2CFF
The most obvious symptom is an air conditioner that stops cooling, works intermittently, or never engages the compressor. The control module may shut the clutch circuit down to protect the driver, so the A/C can appear to work again after the vehicle cools down or the ignition is cycled.
- A/C clutch does not click or engage.
- Cold air becomes intermittent, especially in traffic or on hot days.
- The compressor cycles rapidly or disengages unexpectedly.
- The A/C warning light or check-engine light illuminates.
- Fuse failure, a warm relay, or a melted connector may be present.
- The scan tool shows additional voltage, circuit, or module-temperature codes.
Some vehicles disable the A/C without producing an obvious dashboard warning. If the compressor clutch is not engaging, confirm the code and test the circuit rather than assuming the refrigerant level is the cause.
Why Does the A/C Clutch Driver Overheat?
1. A failing or partially shorted clutch coil
The clutch coil normally has a specified resistance. Internal insulation damage can lower that resistance, forcing the driver to supply more current than intended. The clutch may still operate briefly, which makes this fault easy to miss during a quick visual inspection.
Measure coil resistance with the connector unplugged and compare it with the service-manual specification. A reading that is dramatically lower than specification, unstable while the harness is moved, or shorted to the compressor case points to a defective coil.
2. Compressor or clutch bearing drag
A clutch coil can be electrically acceptable while the mechanical assembly is binding. Excessive pulley drag, a failing bearing, incorrect clutch air gap, or a compressor beginning to seize can keep the clutch engaged under abnormal load and raise circuit temperature.
With the engine off, inspect pulley rotation and clutch condition. Do not put hands near a running belt or rotating compressor. A burned clutch face, blue heat marks, rubber dust, or a strong electrical odor is valuable evidence.
3. Shorted, damaged, or incorrectly repaired wiring
Harness damage near the compressor is common because the wiring is exposed to engine heat, oil, water, and vibration. A power wire rubbing against ground can blow a fuse, while damaged insulation or an incorrect repair can create excessive current through the driver.
- Inspect the compressor connector for corrosion, loose terminals, and heat discoloration.
- Follow the harness to the relay, fuse box, and control module.
- Look for aftermarket alarm, remote-start, or audio wiring spliced into the A/C circuit.
- Check whether the harness is trapped against the exhaust or a sharp bracket.
4. Defective relay, fuse, or power supply
A sticking relay may keep the clutch energized when the PCM is not commanding it. A loose fuse-box terminal can create heat and voltage loss, while an incorrect fuse rating can allow damage that the original circuit was designed to prevent.
Do not install a higher-amperage fuse to stop repeated failures. That can turn a manageable circuit fault into a damaged harness or fire risk.
5. Poor ground or excessive voltage drop
The clutch needs a stable power and ground path. Corrosion at a ground point, battery terminal, fuse-box connection, or module connector can increase resistance. The driver may then run hotter even though the clutch coil’s static resistance appears normal.
A voltage-drop test under load is more useful than simply checking continuity. Test the positive and ground sides while the clutch is commanded on, following the limits in the vehicle’s service information.
6. Failed control module driver
If the coil, wiring, relay, power supply, and grounds all pass their tests, the internal output transistor or current-sensing circuit may be faulty. On some models the driver is inside the PCM; on others it is part of an A/C amplifier or body control module.
Module replacement should be the last step. Many replacement modules require programming, immobilizer synchronization, or configuration, and a shorted clutch coil can damage the replacement unit immediately.
How to Diagnose P2CFF Correctly
- Record all codes and freeze-frame data. Note engine temperature, system voltage, A/C request status, and whether the code is current or stored.
- Confirm the complaint. Check whether the clutch engages, whether the air becomes cold, and whether the fault returns only after prolonged operation.
- Check the basics first. Inspect the A/C fuse, relay, connectors, belt, compressor pulley, and visible harness damage.
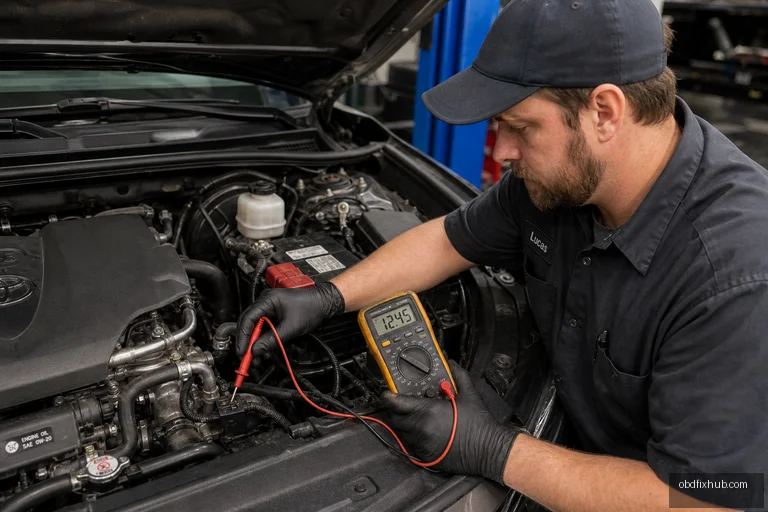
- Test clutch coil resistance. Disconnect the coil before measuring. Compare the result with the manufacturer’s specification, not a generic internet value.
- Test for a short to ground. The disconnected clutch circuit should not show an unwanted path to the compressor housing or engine ground.
- Perform voltage-drop tests. Measure the supply and ground paths while the clutch is commanded on. A circuit can show battery voltage with no load and still fail under load.
- Use a current clamp if available. Excessive steady current, a slow current rise, or an irregular waveform can separate a coil problem from a control-side problem.
- Verify the command with a scan tool. Check whether the module is requesting clutch operation and whether it is shutting the circuit down for protection.
A useful real-world clue is timing. If the A/C works for ten to twenty minutes and then stops until the vehicle cools, suspect thermal overload, clutch drag, or a coil that changes resistance when hot. If the fuse fails immediately when the clutch is commanded, prioritize a short circuit or severely damaged coil.
How to Fix P2CFF
The correct repair depends on the test results. Replace a clutch coil or compressor assembly only when its resistance, mechanical condition, or current draw is outside specification. Repair damaged wiring with sealed, properly crimped connections and secure the harness away from heat and moving components.
- Replace a burned or sticking relay with the correct part number.
- Clean and tighten approved ground connections.
- Repair loose or heat-damaged fuse-box terminals.
- Correct an excessive clutch air gap or damaged clutch hardware where serviceable.
- Replace and program the control module only after the external circuit passes testing.
After the repair, clear the code and operate the A/C through several clutch cycles, including a hot idle test. Confirm that vent temperature drops normally, clutch current remains within specification, and P2CFF does not return.
Can You Drive With P2CFF?
Usually, the vehicle can be driven if the A/C is switched off and there are no belt, smoke, burning-smell, or overheating symptoms. Do not continue operating the system if the compressor is noisy, the clutch is locked, a fuse repeatedly blows, or wiring becomes hot. A seized compressor can damage the serpentine belt and potentially disable other belt-driven accessories.
Frequently Asked Questions
Is P2CFF caused by low refrigerant?
Low refrigerant can prevent normal A/C operation, but it is not usually the direct cause of an overheated clutch driver. Check refrigerant pressure only with the correct equipment; do not use pressure readings as a substitute for electrical testing.
Does P2CFF mean I need a new compressor?
No. The fault may come from the clutch coil, relay, harness, ground, or control module. The compressor should be replaced only when mechanical inspection and electrical measurements justify it.
Why does the A/C work after clearing the code?
Clearing the code may reset a protective shutdown temporarily. If the underlying current or heat problem remains, the driver will usually shut down again after the clutch operates under load.
Can a bad clutch relay cause P2CFF?
Yes. A relay that sticks, has burned contacts, or creates excessive resistance can keep the clutch energized or generate heat in the circuit. Test relay operation and voltage drop rather than relying only on a visual inspection.
What should I check first after seeing P2CFF?
Record all codes, inspect the clutch connector and nearby wiring, verify the fuse and relay, then measure coil resistance against the vehicle-specific specification. Avoid replacing the PCM before those checks are complete.
Bottom Line
P2CFF identifies an overheating A/C clutch control driver, but the driver is often reacting to another fault. Start with clutch-coil resistance, mechanical drag, wiring, relay condition, grounds, and loaded voltage-drop tests. Once the cause is repaired, verify the system under real operating temperature instead of simply clearing the code and returning the vehicle to service.