B3A34 Active Aerodynamic Feature A Actuator Position Sensor Not Learned means the vehicle’s control module cannot complete or retain the calibration of the actuator that moves an aerodynamic device. The fault may involve a spoiler, grille shutter, air dam, flap, or its position-feedback circuit. In practice, the repair is rarely solved by simply clearing the code; the actuator must be inspected, the mechanism freed, wiring tested, and the correct learn procedure completed with a capable scan tool.
What Does B3A34 Mean?
The B3A34 diagnostic trouble code is associated with an active aerodynamic system. These systems use electric actuators to change airflow around the vehicle for cooling, drag reduction, stability, or fuel economy. “Feature A” is the manufacturer’s designation for one particular aerodynamic device, while the exact component varies by vehicle make, model, and equipment level.
“Position sensor not learned” does not necessarily mean the sensor is electrically dead. It usually means the aerodynamic control module has not successfully learned the actuator’s expected home, open, closed, or travel-limit positions. The module compares commanded movement with position feedback. If the feedback is missing, implausible, outside the expected range, or interrupted during calibration, B3A34 can be stored.
Common Symptoms of B3A34
Some vehicles display only a warning message, while others disable the active aerodynamic feature and store the actuator in a safe position. The symptoms depend on which device is affected and whether the fault occurs during startup, operation, or calibration.
- Check engine light, service message, or aerodynamic system warning
- Front grille shutters, rear spoiler, air dam, or active flap remaining fixed
- Clicking, buzzing, repeated actuator movement, or a brief motor run after ignition
- Reduced aerodynamic efficiency at highway speed
- Cooling fan operation or engine temperature concerns if an active grille shutter is involved
- A calibration or actuator relearn procedure that stops before completion
- Additional communication, low-voltage, or actuator performance codes
A useful real-world clue is repeated cycling. If the actuator moves for several seconds every time the vehicle is started and then the warning returns, the module may be trying to find its learned limits but cannot reconcile the sensor signal with the mechanical position.
Why the Actuator Position Sensor Is Not Learned
1. Mechanical obstruction or binding
Road debris, ice, mud, broken plastic guides, or a distorted mounting bracket can prevent the flap or shutter from reaching its limits. A motor may still sound normal while the mechanism stops a few millimeters short of the required position. Never force a delicate grille shutter or spoiler by hand; the gears and linkage can be damaged easily.
2. Failed actuator or integrated position sensor
Many active aerodynamic actuators contain the electric motor, reduction gears, and position sensor in one sealed assembly. Internal gear wear, water intrusion, a worn potentiometer track, or a failed Hall-effect sensor can produce an intermittent feedback signal. In that situation, replacing only an external sensor is often impossible because it is not serviced separately.
3. Wiring, connector, or ground problems
Low-mounted aerodynamic components are exposed to water, salt, stones, and pressure-washing. Look for green corrosion, pushed-out terminals, chafed wiring, broken wires near the actuator, and loose grounds. A connector can appear clean externally while moisture has migrated behind the terminal seal.
4. Low battery voltage or interrupted calibration
Actuator learning is sensitive to voltage. A weak battery, poor battery connection, or a battery charger that cannot maintain stable voltage may cause calibration to fail. Opening a door, switching on high-current accessories, or turning the ignition off before the routine finishes can also interrupt the process.
5. Incorrect replacement part or missing setup
An actuator with the wrong hardware revision may bolt into place but provide a different feedback range. Some vehicles require an actuator initialization, module configuration, software update, or vehicle-specific learn command after replacement. Installing the part without performing that procedure can leave B3A34 active even when the new component is functional.
How to Diagnose B3A34 Properly
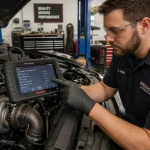
Begin with a complete vehicle scan, not just a generic code reader. Record all stored, pending, and manufacturer-specific codes, along with freeze-frame data. A low-voltage code, communication code, or another actuator code may be the primary fault that prevented the position sensor from learning.
- Identify Feature A. Use the vehicle’s service information or scan-tool component list to confirm whether Feature A is a grille shutter, spoiler, air dam, or another device.
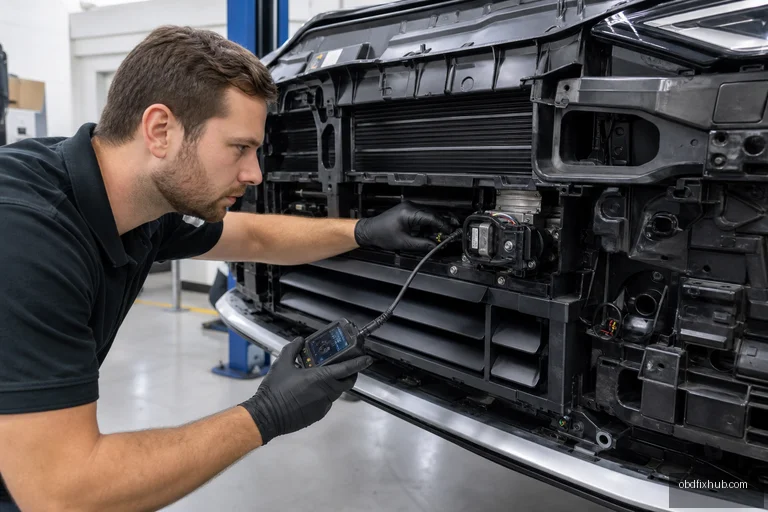
- Inspect movement and condition. Check for obstruction, cracked linkage, bent panels, missing clips, and signs of impact. Compare both sides if the system uses paired flaps.
- Inspect the connector and harness. Follow the harness from the actuator to the main loom. Pay special attention to areas exposed behind the bumper or under the vehicle.
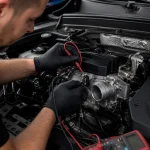
- Verify power and ground under load. A voltage reading with no electrical load can be misleading. Check voltage while commanding the actuator and perform a voltage-drop test on the ground circuit.
- Use live data. Compare commanded position with actual position. A fixed reading, erratic percentage, implausible value, or position that does not change during movement points toward the sensor, wiring, or actuator.
- Run the manufacturer-specific calibration. Follow the scan tool’s prompts exactly. Keep the battery voltage stable and do not touch the mechanism during the routine.
One diagnostic detail saves considerable time: separate a mechanical failure from a feedback failure. If the actuator reaches both physical limits but live data does not change, suspect the sensor or its wiring. If live data changes smoothly but the mechanism stops early or stalls, inspect the linkage, gears, and housing for binding.
How to Fix the B3A34 Code
Repair depends on the test results rather than the code description alone. Remove debris and repair damaged brackets or linkage when the mechanism is restricted. Clean or repair corroded terminals using the correct automotive repair method; do not rely on spraying contact cleaner into a sealed connector and reinstalling it without checking terminal tension.
If the motor, gear train, or integrated position sensor is defective, replace the actuator or the complete active aerodynamic assembly specified by the manufacturer. After installation, clear the code and perform the required initialization or position learn. Some systems also require a software update or a control-module configuration step, particularly when the actuator part number has changed.
Do not replace the actuator immediately when the vehicle has low system voltage or a damaged harness. I have seen new actuators fail to learn because a broken ground wire caused the same symptom as the original component. A stable power supply, accurate wiring tests, and live-data confirmation are more reliable than parts swapping.
Can You Drive With B3A34?
Short-term driving may be possible if the vehicle is operating normally and no overheating, collision damage, or loose component is present. However, driving should be limited when an active grille shutter is stuck closed, when an air dam is hanging below the vehicle, or when the warning is accompanied by rising engine temperature. The code can affect cooling airflow or allow a damaged part to detach at speed.
After repair, confirm that the warning does not return during a complete ignition cycle and road test. Recheck live data if possible, and inspect the device after driving through rain or at highway speed. A successful code clear without a completed learn procedure is not proof that the system is fixed.
Frequently Asked Questions
Is B3A34 caused by a bad position sensor?
It can be, but not always. Binding, wiring damage, low voltage, incorrect actuator installation, and an incomplete calibration can all prevent the sensor from being learned.
Can a basic OBD scanner fix B3A34?
A basic scanner may read and clear the code, but it usually cannot access the active aerodynamic actuator tests or position-learn routine. A manufacturer-capable scan tool is normally required.
Does disconnecting the battery reset B3A34?
Battery disconnection may erase temporary data on some vehicles, but it does not repair a mechanical or electrical fault. The code will return if the actuator still cannot complete calibration.
How much does a B3A34 repair cost?
Cost varies widely. Cleaning an obstruction or repairing a connector may be inexpensive, while replacing an integrated actuator or aerodynamic assembly can be substantially more costly. Diagnosis should come before ordering parts.
Bottom Line
B3A34 indicates a failed or incomplete position-learning process for an active aerodynamic actuator, not automatically a failed sensor. Identify the exact Feature A component, inspect its mechanical travel and wiring, verify voltage, observe live position data, and complete the correct manufacturer calibration. If the code returns after a verified relearn, the actuator assembly, harness, or control module requires deeper testing before replacement.
Action step: Scan for related codes, identify Feature A for your exact vehicle, and test the actuator while monitoring commanded and actual position before buying parts.