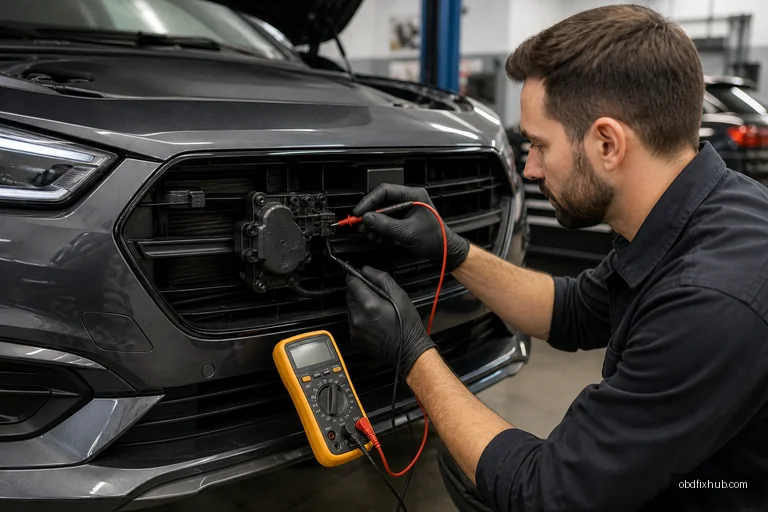
B3A3A Active Aerodynamic Feature A Position Sensor 1 Circuit High Voltage means the vehicle control module has detected an abnormally high voltage on the feedback circuit for position sensor 1 of active aerodynamic feature A. The fault may be caused by a short to voltage, an open sensor ground, damaged wiring, corrosion, or a failed position sensor—not necessarily by the aerodynamic actuator itself.
This is an informational diagnostic trouble code, so the first step is accurate circuit testing rather than immediately replacing expensive active grille shutters, a spoiler actuator, or an aerodynamic control module. Because B3A3A is manufacturer-specific, the exact component and voltage limits must be confirmed with the vehicle’s factory service information.
What Does B3A3A Mean?
Active aerodynamic systems use electrically controlled shutters, flaps, spoilers, air dams, or grille vents to improve cooling, fuel economy, stability, or high-speed airflow. An actuator moves the component, while a position sensor reports its actual location to the control module.
In this code, “Feature A” identifies one aerodynamic system or actuator group, and “Position Sensor 1” identifies a particular feedback signal. “Circuit High” means the module sees more voltage than expected on that signal. It does not automatically mean the flap is physically stuck in the open or closed position.
Many position sensors use a five-volt reference, a sensor ground, and a variable signal wire. Depending on the design, the signal may normally move through a range such as approximately 0.5 to 4.5 volts. A signal that remains near the reference voltage can trigger a high-input code when the module expects the voltage to change as the actuator moves.
Common Causes of the B3A3A High-Voltage Code
- Signal wire shorted to the five-volt reference or battery voltage: This is especially common after wiring has been crushed, melted near a radiator, or repaired incorrectly.
- Open or high-resistance sensor ground: A missing ground can make the signal appear artificially high even when the sensor itself is functional.
- Failed position sensor: The sensor track or internal electronics may be worn, contaminated, or stuck at its maximum output.
- Damaged connector terminals: Water intrusion, green corrosion, loose pins, or pushed-back terminals can interrupt the reference, ground, or signal circuit.
- Actuator feedback failure: Some aerodynamic actuators contain an integrated position sensor. In that case, the actuator assembly may require replacement.
- Mechanical binding: Ice, road debris, broken shutter vanes, or a bent spoiler linkage can prevent the sensor from following commanded movement.
- Control module or software fault: This is less common and should only be considered after power, ground, wiring, sensor output, and calibration have been verified.
Symptoms You May Notice
The check engine light or service warning may be the only obvious symptom. The vehicle can continue to drive normally when the aerodynamic feature is not essential for basic engine operation, but the system may be disabled as a protective measure.
Depending on the vehicle, drivers may also notice reduced fuel economy, active grille shutters that stay open, a spoiler that fails to deploy, a warning message about the aerodynamic system, or an engine cooling fan that operates more frequently. Some vehicles restrict performance or prevent a drive mode from being selected when the actuator position is unknown.
A useful clue is the code’s behavior after clearing it. If B3A3A returns immediately with the ignition on and the actuator stationary, suspect an electrical fault such as a short to voltage or missing ground. If it returns only during a commanded movement, inspect the linkage, actuator load, and sensor range.
How to Diagnose B3A3A Correctly
1. Confirm the code and check related faults
Use a scan tool that can access the body, chassis, and aerodynamic control modules—not only generic engine OBD data. Record all stored, pending, and history codes before clearing anything. A related actuator, communication, low-voltage, or reference-voltage code can point to a shared problem.
2. Inspect the system before using a multimeter
With the ignition off, examine the actuator and its harness. Look for damaged insulation near the radiator support, bumper, underbody panels, hinges, and moving spoiler mechanisms. Check for leaves, stones, ice, or broken plastic that could overload the mechanism. Do not place fingers near powered shutters or linkages; some systems can move unexpectedly during a self-test.
3. Test the reference, ground, and signal
Follow the wiring diagram for the exact vehicle. With the connector attached or back-probed as specified by the manufacturer, verify the sensor reference voltage and ground quality. A ground-side voltage-drop test under load is more reliable than simply checking resistance with the connector unplugged.
Measure the signal while commanding the aerodynamic feature through the scan tool’s active test function. The voltage should change smoothly rather than remain fixed, jump abruptly, or exceed the specified range. Never force a test lead into a sealed connector because spreading the terminal can create a new intermittent fault.
4. Separate a sensor fault from a wiring fault
If the signal is high, disconnect the sensor or actuator and recheck the harness side. If the high voltage remains on the signal wire, the wire may be shorted to a voltage source. If the signal drops to a normal value with the component unplugged, the sensor or integrated actuator electronics become the main suspects.
Use a continuity and short-to-ground test only with the relevant modules disconnected. Continuity alone does not prove that a wire can carry a stable signal; a terminal may pass a basic test and still fail when vibration or load is applied. Wiggle-testing the harness while watching live data often exposes faults that appear only when the vehicle moves.
Repair Options for B3A3A
- Repair chafed wiring with automotive-grade wire and sealed splices, keeping the original routing and protection.
- Replace corroded or loose terminals rather than spraying contact cleaner and reusing a poor connection.
- Replace the position sensor if it is a separate serviceable component and its output is outside specification.
- Replace the complete actuator when the sensor is integrated into the actuator and the linkage is mechanically sound.
- Repair or replace damaged shutters, hinges, spoiler linkages, or mounting brackets that prevent proper movement.
- Carry out the required initialization, relearn, or calibration procedure after installing an actuator or sensor.
After the repair, clear the code and run the manufacturer’s actuator calibration or functional test. Then perform a road test under the conditions that originally set the fault, while monitoring commanded position and actual position. A code that stays cleared at idle but returns at highway speed may indicate vibration, airflow-related movement, or a harness problem that was not fully corrected.
Can You Drive With B3A3A?
Short-distance driving is often possible if the vehicle has no overheating, braking, stability, or physical safety symptoms. However, continuing to drive indefinitely can leave the aerodynamic feature in the wrong position, reduce efficiency, restrict cooling airflow, or cause further actuator damage.
Stop driving and arrange an inspection if the vehicle is overheating, the actuator is loose, a spoiler is partially deployed, plastic parts are hanging under the vehicle, or the warning is accompanied by multiple electrical faults. Do not manually force motorized shutters or spoilers into position unless the service procedure specifically allows it.
Final Takeaway
B3A3A is a high-voltage fault in the position feedback circuit for an active aerodynamic system. Start with the connector, harness routing, sensor ground, reference voltage, and live position data. Only replace the actuator or control module after testing proves that the component—not the wiring or mechanical assembly—is responsible.
If you have the code on your vehicle, record the make, model, engine, related codes, and live-data readings before ordering parts. That information can turn a costly guess into a precise repair.
Frequently Asked Questions
Is B3A3A the same as a stuck active grille shutter code?
Not necessarily. B3A3A specifically indicates a high voltage condition in a position sensor circuit. A stuck shutter may cause the code, but an electrical short, open ground, or failed sensor can produce the same fault.
Can a weak battery cause B3A3A?
Low system voltage can create multiple misleading codes, but it is not the typical direct cause of a sensor circuit high fault. Check battery voltage, charging voltage, and related module codes before diagnosing the sensor circuit.
Do I need to replace the complete active aerodynamic actuator?
Only if the position sensor is integrated into the actuator or testing confirms actuator electronics failure. On some vehicles the sensor is separately serviceable, so the wiring diagram and parts catalog should be checked first.
Will clearing B3A3A fix the problem?
Clearing the code only removes the stored fault temporarily. If the high-voltage condition remains, the code will return, often immediately or during the next actuator self-test.