P2E3D Battery Charger Output Short Circuit means the vehicle has detected an abnormal low-resistance path on the battery charger output circuit, usually involving the onboard charger and the high-voltage battery connection. The car may stop AC charging immediately to prevent damage, and the fault normally requires more than simply clearing the code.
This is an EV or hybrid charging-system diagnostic trouble code, not a conventional engine fault. The exact test criteria can vary by manufacturer, but the practical meaning is consistent: the charger sees a short circuit, an output voltage that collapses under load, or an electrical condition that looks unsafe.
What Does P2E3D Battery Charger Output Short Circuit Mean?
During AC charging, the onboard charger converts household or public AC electricity into controlled DC power for the high-voltage battery. The vehicle monitors charger output voltage, current, insulation, contactors, and communication with the battery management system. If output positive and negative are bridged, shorted to ground, or pulled outside the expected electrical range, the charging control module can store P2E3D.
In some vehicles, the code may be described as a charger output short to ground, charger DC output short circuit, or battery charger output overcurrent. These descriptions are related but not always interchangeable. Always verify the manufacturer-specific definition and diagnostic procedure before replacing an onboard charger.
Common Causes of P2E3D
- Damaged onboard charger: Internal power transistors, capacitors, diodes, or output-stage components can fail and create a direct or intermittent short.
- Moisture in the charging system: Water intrusion at the charge port, charger connector, or high-voltage junction can produce leakage between terminals.
- Damaged high-voltage wiring: A crushed, chafed, overheated, or incorrectly routed cable can allow the output conductors to contact each other or the vehicle body.
- Contaminated charge-port terminals: Road salt, dirt, corrosion, or melted plastic can create an unintended conductive path.
- Failed high-voltage contactor or precharge circuit: A contactor that welds closed or a precharge component that fails can make the charger see an abnormal load.
- Battery pack or battery junction box fault: Internal battery-side components can cause excessive current demand or an apparent charger output short.
- Incorrect previous repairs: Reversed connectors, damaged terminal locks, wrong fuses, or aftermarket charging equipment can trigger the code.
- Low-voltage supply or communication problems: A weak 12-volt battery usually does not create a genuine output short, but it can cause unreliable charger control and misleading secondary codes.
Symptoms You May Notice
The most common symptom is that the vehicle refuses to charge from an AC wall box or portable charging cable. The charge indicator may turn red, stop flashing, or change to a fault status shortly after the connector is plugged in. Some vehicles begin charging for a few seconds before opening the contactors and displaying a charging-system warning.
- Charging stops immediately or will not start.
- The instrument panel displays a charging fault, EV system warning, or check-engine light.
- AC charging fails while DC fast charging may still work, depending on the failed circuit.
- The onboard charger cooling fan or pump may run unusually long.
- Additional codes appear for high-voltage isolation, contactors, overcurrent, or battery charging control.
- The code returns immediately after clearing or returns only when a charging session begins.
One useful diagnostic clue is the charging method that fails. If Level 1 and Level 2 AC charging both fail but DC fast charging remains available, the onboard AC charger and its output circuit deserve close attention. If every charging method fails, inspect the high-voltage battery, contactors, isolation system, and low-voltage power supply as well.
How to Diagnose P2E3D Safely
High-voltage EV systems can remain dangerous even when the ignition is off. Do not unplug orange cables, open the battery pack, or measure charger output with a standard multimeter unless you are trained and equipped for high-voltage automotive work. A professional technician should use the vehicle’s service disconnect procedure, insulated tools, appropriate personal protective equipment, and a verified CAT-rated meter.
1. Confirm the code and charging conditions
Use a scan tool that can communicate with the EV powertrain, battery management system, and onboard charger. Record all current, pending, and history codes, along with freeze-frame data. Note whether the fault appears with a home charger, a public AC station, or more than one charging cable.
Do not clear the code repeatedly before recording the data. The first failure often reveals whether the charger detected the fault at startup, during precharge, or only after current began flowing.
2. Check the 12-volt system first
A weak 12-volt battery can interrupt contactor control and charging communication. Check the battery at rest and under load, inspect its terminals, and confirm that the DC-DC converter operates correctly. This will not repair a genuine high-voltage short, but it prevents a low-voltage control problem from sending the diagnosis in the wrong direction.
3. Inspect the charge port and visible connectors
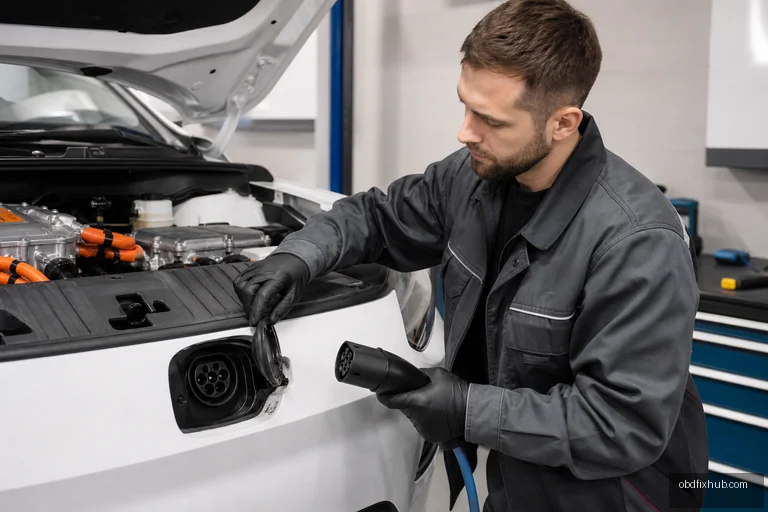
With the vehicle safely powered down, inspect the charge inlet for bent pins, discoloration, melted plastic, corrosion, standing water, or debris. Look for evidence of overheating around the AC pins rather than relying only on visual cleanliness. A charging port that is damp after washing or rain should be allowed to dry and should not be forcefully blown with compressed air into the connector.
4. Test the charger output circuit according to the service manual
A qualified technician will isolate the high-voltage system and test for continuity, insulation resistance, and unwanted resistance between the charger output terminals, chassis ground, and battery-side circuit. The correct test voltage and acceptable resistance are manufacturer-specific. Applying an improvised insulation test or probing energized terminals can damage electronic modules and cause serious injury.
5. Use live data and component isolation
Scan-tool data may show requested charger voltage, actual output voltage, charging current, contactor status, isolation resistance, and charger temperature. If the charger is commanded on but output voltage immediately collapses while the battery-side circuit is normal, the onboard charger becomes a strong suspect. If the fault remains with the charger disconnected and the battery-side circuit isolated, the cable, junction box, or battery assembly requires further testing.
Repair Options and the Correct Fix
The repair depends on where the short is located. A contaminated charge port may need professional cleaning or replacement, while a damaged high-voltage harness requires replacement and correct routing rather than a temporary splice. If the onboard charger has an internal semiconductor failure, replacement or specialist electronic repair may be necessary.
- Replace a corroded, burned, or physically damaged charging inlet.
- Repair or replace damaged high-voltage cables using approved parts and procedures.
- Replace a failed onboard charger after confirming the battery-side circuit is not the cause.
- Repair the high-voltage junction box, precharge circuit, or contactor when testing identifies those components.
- Resolve moisture intrusion by replacing damaged seals and correcting the source of water entry.
- Test or replace the 12-volt battery when low voltage is producing related control faults.
After the repair, the technician should clear the codes, complete any required charger or battery-module programming, and perform a controlled AC charging test. A successful code clear is not proof of repair; the vehicle must complete the charging handshake and deliver stable current without recreating P2E3D.
A Practical Example from the Workshop
Consider an EV that charges normally at home until heavy rain, then reports P2E3D as soon as the cable is connected. Inspection finds moisture and green corrosion inside the charge-port assembly. Replacing the onboard charger would be an expensive mistake in this case. Once the inlet, seal, and affected terminals are repaired, the vehicle can complete its precharge check and the fault no longer returns.
In a different case, the inlet looks perfect and the code appears on multiple known-good charging stations. Live data shows the charger output voltage dropping instantly, while the battery-side wiring passes insulation testing. That pattern points toward an internal onboard charger failure, not a problem with the wall box or charging cable.
Can You Keep Driving with P2E3D?
If the vehicle drives normally, it may still operate because the propulsion battery can retain enough energy for driving. However, charging protection faults should not be ignored. Avoid repeated charging attempts, do not bypass interlocks, and arrange diagnosis before the battery state of charge becomes too low to reach a qualified repair facility.
Stop using the vehicle and seek immediate professional assistance if you notice burning smells, melted connectors, smoke, unusual heat, exposed orange wiring, or a high-voltage warning. These signs indicate a possible thermal or insulation hazard rather than a simple stored code.
Summary: The Best Way to Fix P2E3D
P2E3D identifies an abnormal condition in the battery charger output circuit, most often involving the onboard charger, high-voltage wiring, charge port, contactors, or battery-side connection. Start with a complete scan, verify the 12-volt supply, inspect the charge inlet, and compare the failed charging method with a known-good setup. Because the circuit can carry lethal voltage, high-voltage isolation and output testing should be performed only by a properly trained EV technician.
Frequently Asked Questions
Can a bad charging cable cause P2E3D?
Yes, a damaged or contaminated cable can create abnormal charging behavior, although the stored code may ultimately be generated by the vehicle’s onboard charger. Test with a known-good, compatible cable and charging station before condemning the charger.
Does P2E3D mean the high-voltage battery must be replaced?
No. The code refers to the charger output circuit, and many cases are caused by the charge port, wiring, contactors, moisture, or the onboard charger itself. Battery replacement should only be considered after proper isolation and battery-side testing.
Can I clear P2E3D with an OBD scanner?
You may be able to clear the stored code, but it will return if the fault remains or when charging is attempted again. A basic OBD scanner may also be unable to access the charger and battery control modules.
Why does the car drive but refuse to charge?
Propulsion and charging are controlled by related but separate circuits. The vehicle can disable AC charging to protect the high-voltage system while still allowing limited driving, provided battery charge and other safety conditions remain acceptable.
Is P2E3D always the same on every vehicle?
No. P2E3D is used for a battery charger output short-circuit condition, but the exact detection logic, connector names, and repair procedure vary by manufacturer and model. Confirm the code definition in the vehicle’s factory service information.