P2D7A Battery Charging Stop Switch Circuit means the vehicle has detected an electrical fault in the circuit used to request or confirm a battery-charging stop. In practice, the problem is usually a failed stop/charge switch, damaged wiring, a poor ground, a blown fuse, or a control-module signal that does not match the expected state. The code does not automatically mean the battery itself is defective, and replacing the battery without testing the circuit is a common—and expensive—mistake.
This is an information-focused diagnostic guide rather than a parts-swapping checklist. Because P2D7A can be manufacturer-specific, always verify the exact description, wiring diagram, and test values for your vehicle’s make, model, year, and powertrain before applying a repair.
What Does P2D7A Mean?
P2D7A identifies a fault in the battery charging stop switch circuit. Depending on the vehicle, the switch may be a physical charging-inhibit switch, a service disconnect-related input, a battery charge control request, or an input monitored by the battery management system (BMS), hybrid control module, or powertrain control module (PCM).
The control module continuously checks whether the circuit voltage, resistance, or communication state agrees with the commanded position. If it sees an open circuit, short to ground, short to power, intermittent signal, or implausible switch state, it stores P2D7A. Some vehicles will stop charging immediately; others will limit charging, illuminate a warning lamp, or enter a reduced-power strategy.
Common Causes of the P2D7A Fault
- Defective charging stop switch: Internal contacts can wear, oxidize, or stick, particularly when the switch is mounted near moisture or a charging connector.
- Damaged wiring: Chafed insulation, stretched wires, rodent damage, or a harness trapped under a bracket can create an open or short circuit.
- Corroded connectors: Green corrosion, loose terminals, water intrusion, and pushed-back pins can create a high-resistance signal that looks like a switch failure.
- Blown fuse or poor ground: A fuse may have opened because of a previous short, while a weak ground can make the switch voltage appear erratic.
- Battery current sensor or battery sensor problem: An inaccurate state-of-charge or current signal can cause the charging system to stop or reject a charging request.
- Control-module or software issue: A BMS, PCM, or charger module may need a software update, relearn, or replacement—but only after the external circuit has tested correctly.
- Low 12-volt system voltage: On hybrids and EVs, a weak auxiliary battery can cause multiple charging and communication codes that look unrelated at first.
Symptoms You May Notice
The symptoms depend on whether the vehicle uses a conventional alternator system, a hybrid battery charger, or a high-voltage EV charging system. P2D7A may be stored even when the vehicle still starts and drives normally, especially if the fault is intermittent.
- Battery or charging-system warning light
- Charging stops before the battery reaches the selected level
- “Check charging system,” “Charging unavailable,” or hybrid-system warning message
- Reduced charging speed or refusal to accept a charge
- Intermittent no-start or reduced-power condition
- Unstable battery state-of-charge readings
- Additional codes for battery current, voltage, temperature, or communication
- A battery that appears to discharge while parked because charging is being inhibited
How to Diagnose P2D7A Correctly
A professional diagnosis begins with the complete scan report, not just the first code shown by a basic reader. Record stored, pending, and history codes, along with freeze-frame data. If low-voltage, communication, or battery-current codes appear alongside P2D7A, diagnose the shared power and ground circuits before condemning the switch.
1. Check the battery and charging voltage
For a conventional 12-volt system, inspect the battery state of charge and measure voltage with the engine off and running. A fully charged lead-acid battery is typically near 12.6 volts at rest, while charging voltage often falls in the approximate 13.5–14.8-volt range. These are general reference values, not vehicle-specific specifications; smart charging systems may intentionally vary voltage.
On a hybrid or EV, do not probe orange high-voltage cables or battery terminals. High-voltage diagnosis requires the manufacturer’s service procedure, insulated equipment, and appropriate training. A scan tool can often reveal whether the high-voltage battery is being inhibited without exposing you to dangerous components.
2. Inspect the switch and harness
Locate the charging stop switch or its connector using the factory wiring diagram. Look for moisture, bent terminals, loose locking tabs, insulation rubbed through against metal, and aftermarket accessories spliced into the circuit. A useful workshop trick is to perform a gentle wiggle test while monitoring the live switch state on a capable scan tool; an intermittent signal during movement strongly suggests a harness or terminal problem.
3. Test the circuit, not just the component
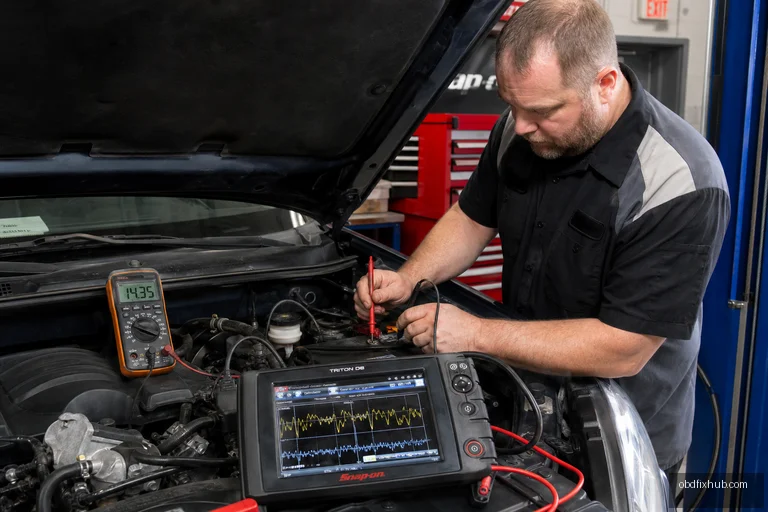
With the circuit isolated as required by the service manual, test continuity and resistance across the switch in each commanded position. Then verify reference voltage, signal voltage, and ground under load. Do not rely on a continuity beep alone: a wire can show continuity with a meter yet fail when current flows through it.
A voltage-drop test is often more revealing. With the circuit operating, measure voltage across the ground path and power path. Excessive voltage drop indicates corrosion or resistance in the connection. Never jumper terminals simply to clear P2D7A; the module may interpret the wrong state as a safety condition, and bypassing a charging interlock can create a serious hazard.
How to Reset the Battery Current Sensor
There is no universal manual reset procedure for a battery current sensor. On many vehicles, the sensor reset is performed through a scan tool function named Battery Sensor Reset, State of Charge Reset, Battery Replacement Registration, or Current Sensor Calibration. The exact function depends on the manufacturer and the battery-management system.
- Charge or replace the 12-volt battery if it is weak.
- Confirm that the battery type and capacity match the vehicle specification.
- Inspect the negative-terminal current sensor and its small connector; do not bypass it.
- Use a compatible scan tool to perform the specified reset or registration procedure.
- Switch the ignition off as instructed, allow the vehicle to sleep, then clear codes and retest.
Disconnecting the battery may erase some learned values, but it is not a reliable sensor calibration and can create new problems, including lost window settings, clock data, or immobilizer-related issues. If the sensor reports impossible current values after the reset, test its power, ground, signal, and connector before replacing it.
How to Fix a Short Circuit in a Car Battery Circuit
A “short circuit in the battery” usually means a short in the vehicle wiring, not an internal short inside the battery. An internal battery fault can cause rapid voltage loss, heating, swelling, or a sulfur smell and should be treated as a battery replacement and safety issue.
For a suspected wiring short, switch the ignition off and disconnect the negative 12-volt terminal only when the service procedure allows it. Remove the relevant fuse and identify which branch causes the fuse to blow. Inspect that branch for rubbed insulation, crushed wiring, water inside connectors, incorrect accessory wiring, or a component that has failed internally.
- Replace a fuse only with the specified amperage; never install a larger fuse or foil.
- Repair damaged wires with properly sized wire, sealed splices, and protected routing.
- Replace heat-damaged connectors rather than squeezing terminals as a permanent repair.
- After repair, verify that the circuit is not shorted before reconnecting the battery.
- On hybrid and EV systems, leave high-voltage faults to a qualified technician.
Symptoms of a Faulty Battery Current Sensor
A failing battery current sensor can produce more than one trouble code because the BMS uses its signal to estimate charge and discharge flow. Common symptoms include inaccurate state-of-charge readings, battery charging that stops too early, a battery warning lamp, repeated low-voltage faults, start-stop system disablement, and electrical loads that behave inconsistently.
One practical clue is a current reading that remains fixed, jumps dramatically with no electrical load change, or shows charging current while the vehicle is clearly not charging. However, the same symptoms can come from a poor terminal connection, a weak battery, or a charging-system problem. Confirm the sensor signal with live data and a meter before replacing it.
When Should You Stop Driving?
Stop and arrange professional assistance if the battery is hot, swollen, leaking, smoking, or producing a strong sulfur odor. Do the same if the vehicle reports a high-voltage isolation fault, refuses to shut down, loses propulsion, or repeatedly blows the main battery fuse. A vehicle that merely stores an intermittent P2D7A with normal operation may be driven to a workshop, but charging should not be repeatedly forced or bypassed.
Bottom Line: The Reliable Fix for P2D7A
P2D7A is a circuit diagnosis, not a verdict that the battery needs replacement. Start with the full code list, battery voltage, fuses, grounds, connector condition, and live switch data. Then test the stop-switch circuit under the manufacturer’s specifications, calibrate the battery current sensor only through the correct procedure, and repair any wiring fault before clearing the code.
Best next step: obtain the vehicle-specific wiring diagram and scan-tool data, then have a qualified technician test the charging stop circuit—especially if the vehicle is a hybrid or EV. Do not defeat an interlock simply to restore charging.
Frequently Asked Questions
What is the fault in the battery charging circuit?
With P2D7A, the fault is in the circuit that communicates the battery charging stop or inhibit state. The likely causes are a bad switch, open or shorted wiring, poor ground, corrosion, a current-sensor signal problem, or a control-module issue.
How do I reset a battery current sensor?
Use a compatible scan tool and the vehicle’s battery sensor reset, registration, or calibration function. Disconnecting the battery is not a dependable reset and may erase useful settings without correcting the underlying fault.
How do I fix a short circuit in a car battery?
Find the affected fused circuit, inspect the wiring and connectors for contact with ground, and repair the damaged section using correct wire and sealed connections. Never fit a larger fuse, and never work on high-voltage hybrid or EV circuits without proper training.
What are the symptoms of a faulty battery current sensor?
Typical symptoms include inaccurate state-of-charge information, charging interruption, battery warnings, repeated low-voltage codes, disabled stop-start operation, and current readings that do not match the vehicle’s actual electrical load.